Forms are used to capture information from a user and are typically used to replace spreadsheets or documents. Forms can be either flat or hierarchical structures and can be filtered, sorted, searched and have paging applied to them. Forms are created from form templates built in the Designer area and an unlimited number of forms can be created from a form template. Forms can have the following types of data field: text, date, value, option list (single or multi-select), evidence, reference (single of multi-select), user group (single of multi-select), information, formula, button, file and sequence. They can import information from other referenced forms in addition to importing information from Excel (see here for more information).
Generally speaking, the contents of a form can be added to or edited by users.
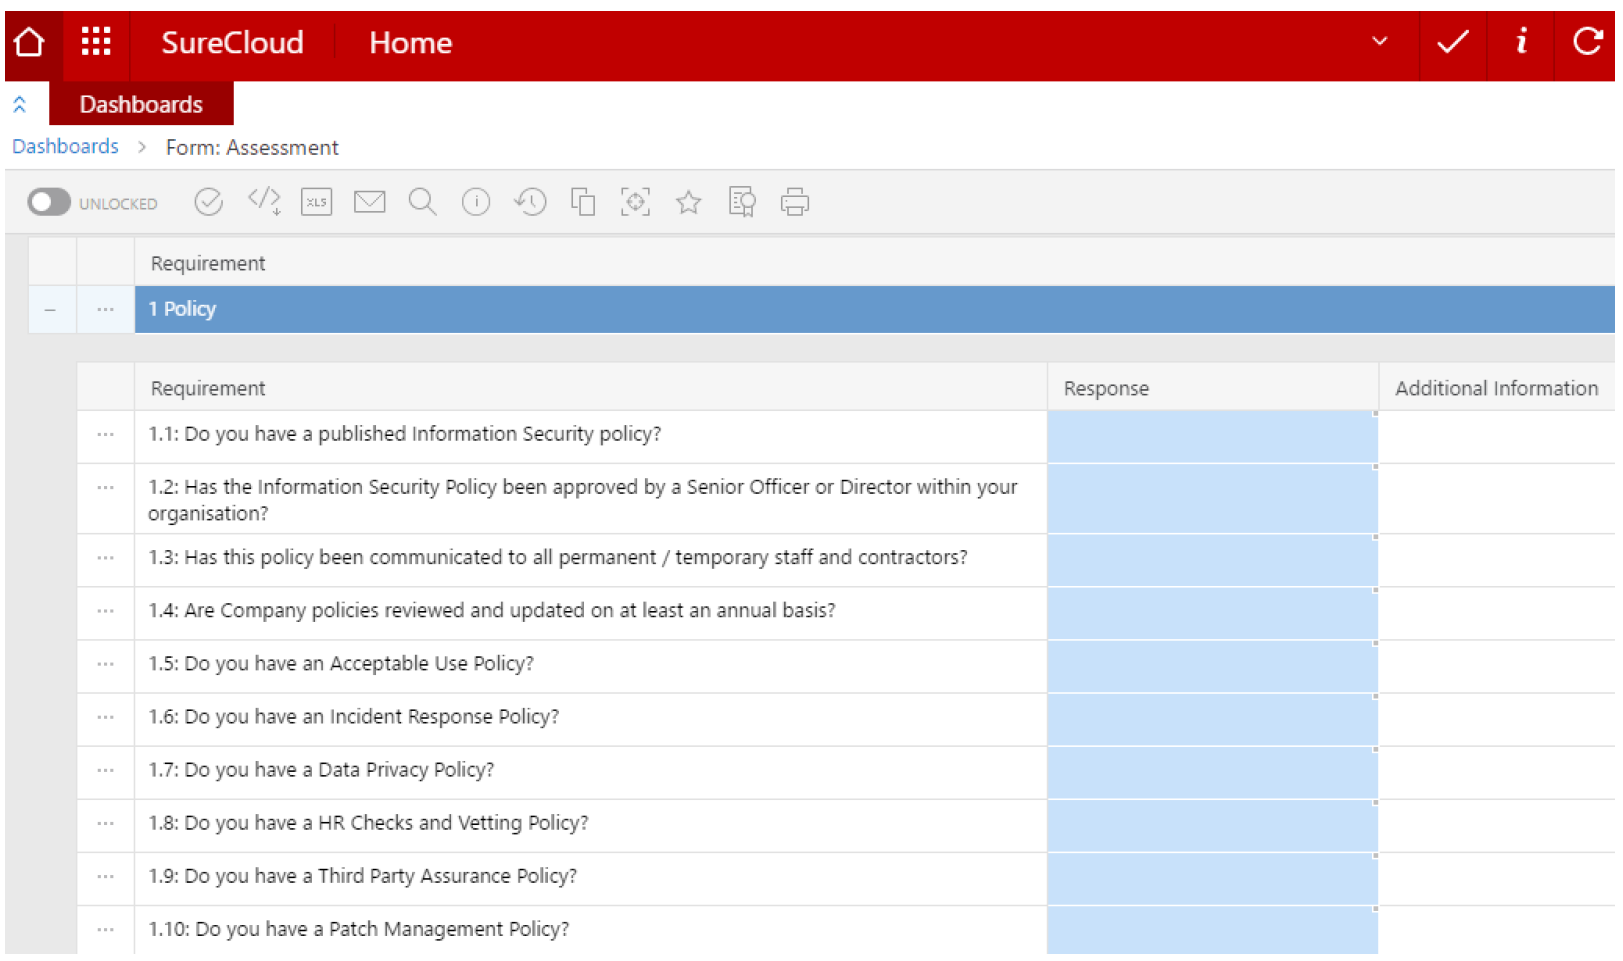
As with initiatives, you can click on the name of the form to see its contents. When you are looking at a form, you will be presented with a screen like this:
Breadcrumb
The breadcrumb is provided throughout the Platform to facilitate navigation and show you where you are in the Platform:

| Item | Title | Description |
| 1 | Overview | This is a title which lets you know where in SureCloud you are currently in, for example Home or Applications. |
| 2 | Breadcrumb | This is the position of the form or initiative you are currently viewing. |
Form Toolbar
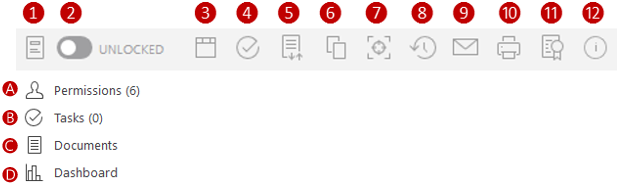
On the form’s main tab, positioned above the form, there is a set of icons providing useful functions. Each form has a series of action icons. The full set of possibilities is discussed below, but not all forms and all users will have every icon (see here for more details).

| Item | Title | Description |
| 1 | Form Menu | See here. |
| 2 | Lock/Unlock Form | Toggle form between editable and read-only for all users |
| 3 | Headers | Toggle whether headers scroll with the page |
| 4 | Tasks | Generate new tasks or associate existing tasks with the form |
| 5 | Export/Import | Multiple options to import data or export into various forms |
| 6 | Copy | Makes an exact copy of the form and all its data |
| 7 | Snapshot | Takes a point-in-time view of the form and its data |
| 8 | History | Toggles response history, allowing access to cell-level audit trails |
| 9 | Send an email to users assigned to this form | |
| 10 | Generates a printable HTML version of the form | |
| 11 | Form Validation | Summary of all components of a form |
| 12 | Form Info | Displays form and template breadcrumb |
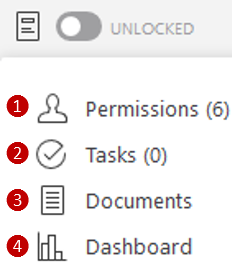
Form Menu
| Item | Title | Description |
| 1 | Permissions | Allocate users and groups to the various permissions in the form |
| 2 | Tasks | List the tasks associated with the form |
| 3 | Documents | Display all documentation and links added via evidence responses |
| 4 | Dashboard | Add charts and reports to the form for visualisations of the data |
Subsections
Some forms are structured so that not all information is displayed when the form is first opened. Quite often, the form will have subsections that can be accessed by the following;
![]() Expand icon – click on this icon at the top of the form to expand all sections or this icon in an individual section to expand that section.
Expand icon – click on this icon at the top of the form to expand all sections or this icon in an individual section to expand that section.
![]() Collapse icon – if the form or a section has been expanded, click on this to collapse all sections or to collapse the individual section.
Collapse icon – if the form or a section has been expanded, click on this to collapse all sections or to collapse the individual section.
Below is an example of a form with subsections.

Adding a Form
To add a form, please follow the steps below:
- Navigate to the initiatives by clicking on the Menu Button
 and click on Applications
  .
. - Go into an initiative where you want to add the form.
- Click on the add form icon
 . This will bring up the following pop-up:
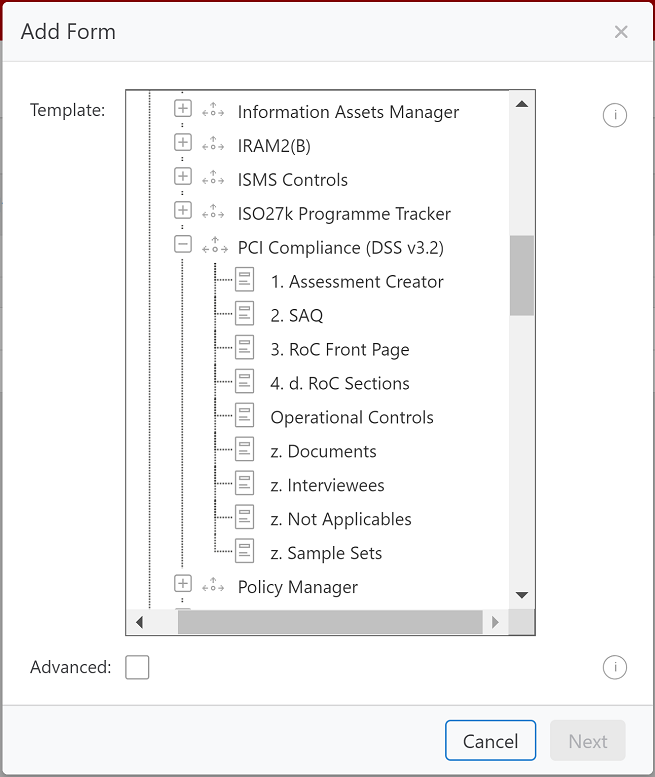
In the first pop-up, you choose the form template you want to use to generate your new form. The form templates have circle icons and are stored in folders. The folders have two states: Closed & Open. Select a form template and then click Next button. On this screen you also have the Advanced check-box. Check this box to allow multiple forms of this type to be created. Each user is automatically allocated to a permission on their Form.
Some forms are stand-alone, others reference information from secondary forms. If your form needs reference information, you will see a screen like this:
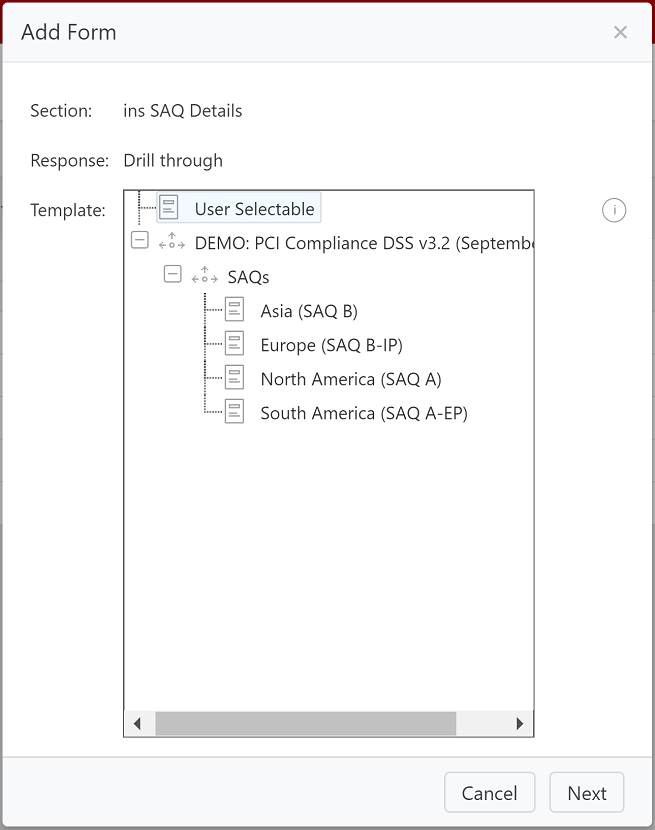
Only suitable forms (those with the appropriate fields) are presented to you at this stage. What is considered to be suitable was determined in the design stage of the form template you have selected.
When you click on the form you want, it is highlighted in light blue. You have the option to select the reference form required. Alternatively, you can leave it to the user to choose at a later time when they are completing the new form. To do this click on User Selectable (this is highlighted in blue above).
You also have the option to fix the reference information to a particular section within a single form by expanding the form in the list and clicking on the section you want. This is highlighted in blue.
The number of screens you get of this type depends on the number of references in the form template. When each reference has been dealt with you will get a final screen like this one:
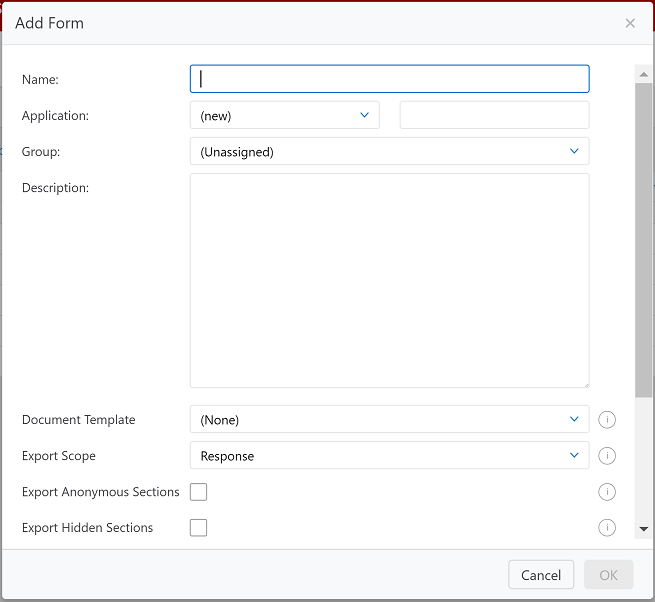
You can then give your form a name, assign it to a relevant application, assign it to a group and give it a description. Once this is completed, click Ok.
Your new Form will immediately show up in the Form list in the Forms sub-tab. Forms are listed in
alphabetical order.
Editing and Deleting Forms
To modify or delete a form, next to the name of the form, click on the edit button ![]() . From here, you can edit the settings and descriptions made when creating the form, on select to Delete or Archive the form.
. From here, you can edit the settings and descriptions made when creating the form, on select to Delete or Archive the form.
Sorting a Form
If the form has been created with this functionality, users have the option to click on a response title to sort by that response. Clicking once sorts in descending order (A to Z); clicking again sorts in ascending order (Z to A). Descending order is indicated with a blue arrow pointing down. Ascending order is indicated with a blue arrow pointing up.
Form Toolbar - Permissions
Some icons can only be seen with certain permission groups. Below is a table outlining these restrictions, with a tick indicating that the specific user group can see the item.
| Contributor | Manager | Administrator | ||||||||
|---|---|---|---|---|---|---|---|---|---|---|
| Item | Title | FC | EU | RO | FC | EU | RO | FC | EU | RO |
| 1 | Form Menu | |||||||||
| A | Permissions | ✓ | ✓ | |||||||
| B | Tasks | ✓ | ✓ | ✓ | ✓ | ✓ | ✓ | ✓ | ✓ | ✓ |
| C | Documents | ✓ | ✓ | ✓ | ✓ | ✓ | ✓ | ✓ | ✓ | ✓ |
| D | Dashboard | ✓ | ✓ | ✓ | ✓ | ✓ | ✓ | |||
| 2 | Lock/Unlock | ✓ | ✓ | ✓ | ||||||
| 3 | Headers | ✓ | ✓ | ✓ | ✓ | ✓ | ✓ | ✓ | ✓ | ✓ |
| 4 | Tasks | ✓ | ✓ | ✓ | ✓ | ✓ | ✓ | |||
| 5 | Excel Export/Import | ✓ | ✓ | ✓ | ✓ | ✓ | ✓ | ✓ | ✓ | ✓ |
| 6 | Copy | ✓ | ✓ | ✓ | ||||||
| 7 | Snapshot | ✓ | ✓ | ✓ | ||||||
| 8 | History | ✓ | ✓ | ✓ | ||||||
| 9 | ✓ | ✓ | ✓ | |||||||
| 10 | Search | ✓ | ✓ | ✓ | ✓ | ✓ | ✓ | ✓ | ✓ | ✓ |
| 11 | ✓ | ✓ | ✓ | ✓ | ✓ | ✓ | ✓ | ✓ | ✓ | |
| 12 | Form Validation | ✓ | ✓ | ✓ | ✓ | ✓ | ✓ | ✓ | ✓ | ✓ |
| 13 | Form Info | ✓ | ✓ | ✓ | ||||||
Key:
RO: Read-only
EU: Edit/update
FC: Full-control
Comments